We have a Husqvarna Designer Topaz 30 embroidery machine, and the needle
holder recently broke in two. The replacement part only was about 30€.
I tried searching for a service manual for that machine, but the results are
really sparse and you get to the strange sites really soon… But it turned out
that the replacement is very easy, you’ll only need a 1.5mm hex key.
- Turn the needle holder to the “down” position using the hand wheel, remove the sewing foot and the hand screw for tightening the needle in the holder.
- Use the 1.5mm hex key to open the little set screw on the left side of the needle holder. Remove the needle holder by sliding it downwards. While you’re at it, grab a paper towel and clean the rod from lint.
- The rod on which the holder sits is actually a hollow pipe. The old holder had a little groove at the lower end which gripped the pipe tightly when the set screw was put in place, and also the hole for the needle was separated from the fixture hole. The new replacement part didn’t have such a groove at the bottom, and the needle hole was not separated by a wall. Instead the new kit came with a little cap thingy that probably helps center the tube and acts as a stopping point when inserting the needle. I just put the cap thingy into the needle holder, the bulge facing upwards. Works for me.
- Put the set screw from the old holder into the upper hole (the replacement kit didn’t come with a set screw), and the tightening screw for the needle into the lower hole.
- Put the holder onto the tube as before, align the set screw so it faces approximately orthogonally to the left, then tighten the set screw.
- Put a needle and a sewing foot in, and make a few test stitches.
Pictures are better than 253 words:
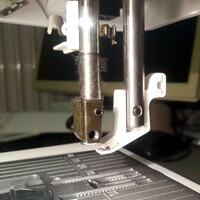 Old needle holder in the “down” position, with the set screw in the upper hole. The needle tightening screw has already been removed.
 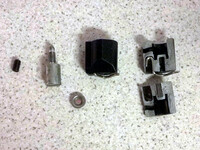 All parts. From left to right: old set screw, needle tightening screw, the new cap thingie, the new needle holder, and the old needle holder, split in two. On the latter you can see the groove at the bottom of the fixture hole.
 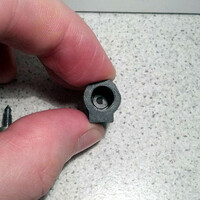 View into the new needle holder. Note that the two holes are not separated.
 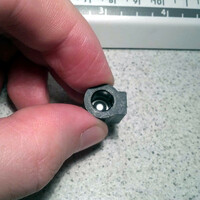 New needle holder with the cap thingie in place, bulge facing upwards.
 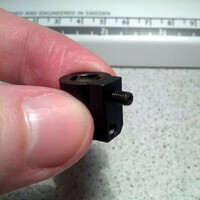 New needle holder with old set screw
 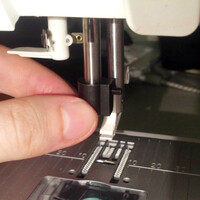 New needle holder on the fixture, aligned and set screw tightened
 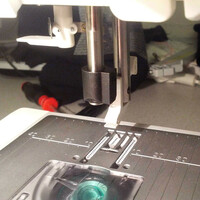 Voilà, it works!